Take kitchen cabinets to the ceiling when you can name what belongs on the highest shelf, or when a continuous cabinet wall is worth the extra cost to you. If the real problem is digging a Dutch oven out of a base cabinet, spend the money on deep drawers first. You can still finish the tops of the uppers with trim.
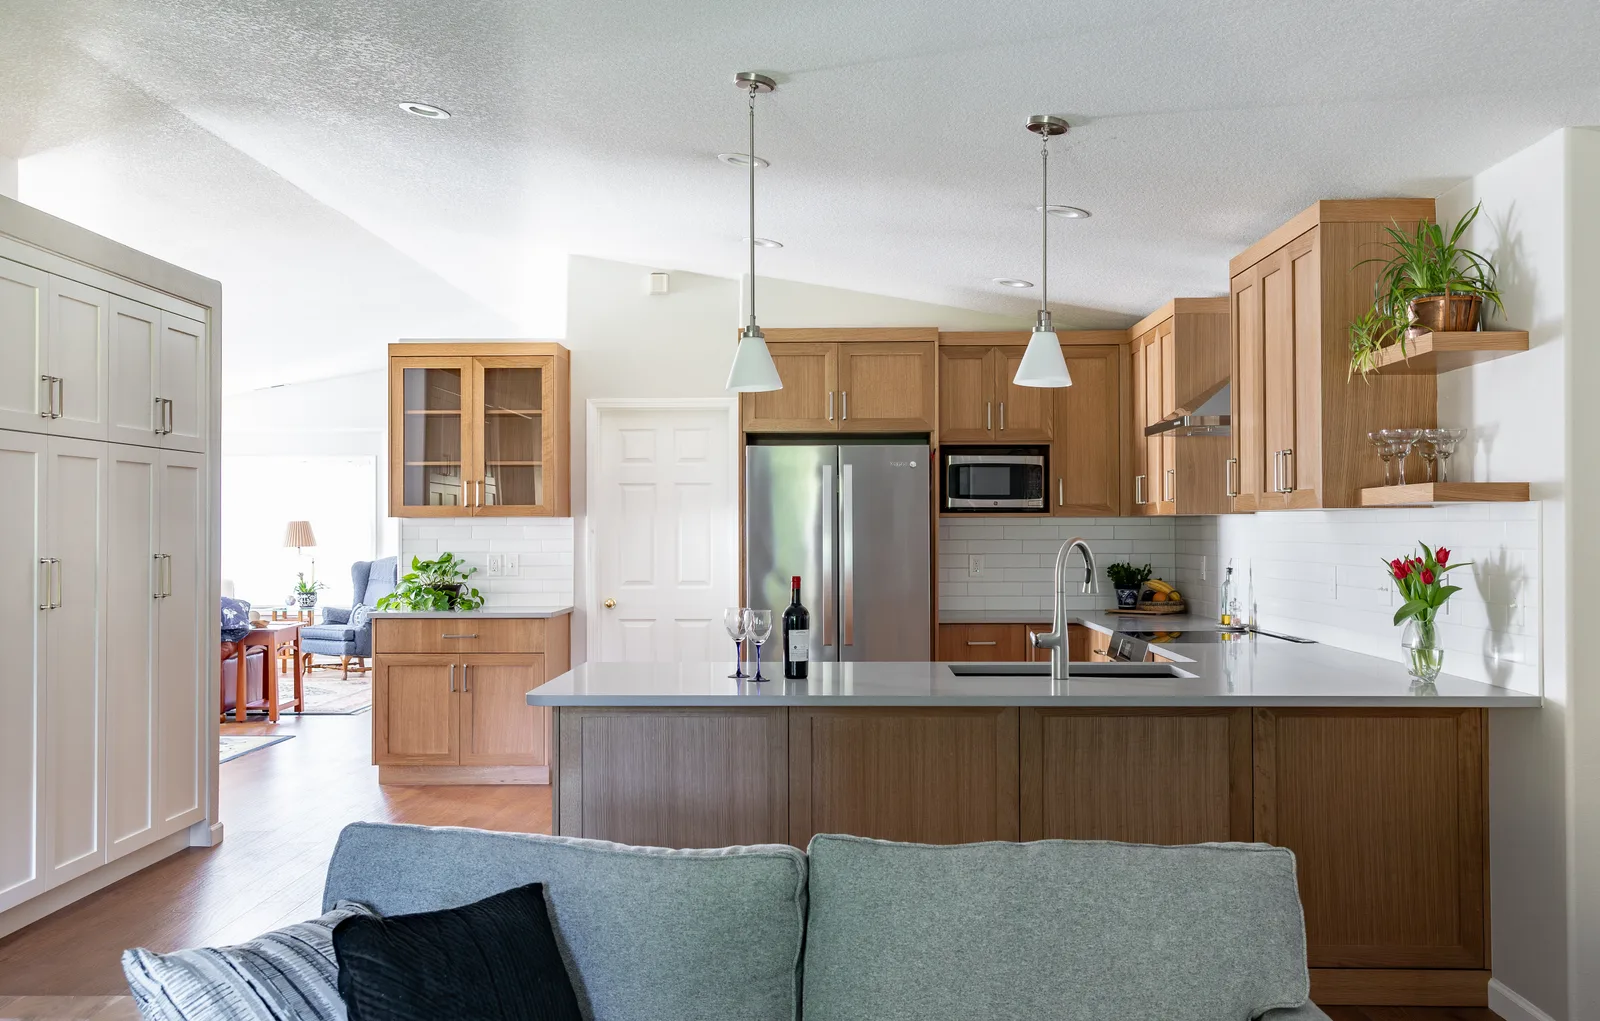
In our Felida remodel, the owners wanted to keep their white kitchen and gain pantry storage. We used solid doors for everyday supplies and a separate row of illuminated glass uppers for display. The same idea can work on one wall without paying for it around the entire room.
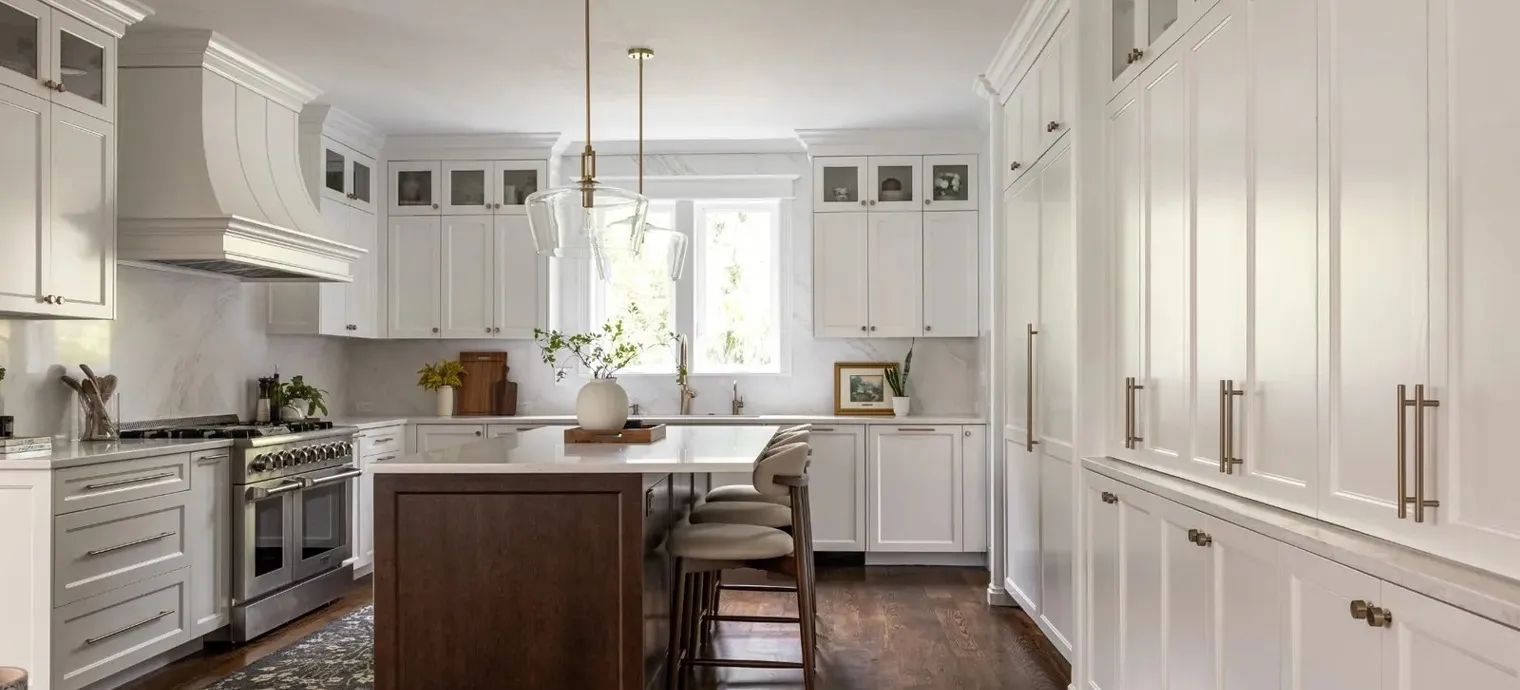
What does the extra row buy you?
On a 10-foot wall, our worked example puts the extra cabinets and installation labor at $952–$1,152 before trim, tax and other extras. That money buys four additional cabinet boxes with their own doors. If you simply want the gap gone, ask your designer to draw a flat trim panel above one row of uppers and price that option, too.
How much extra do ceiling-height kitchen cabinets cost?
Here are two ways to fit out the same straight, 10-foot wall under a 9-foot ceiling. Both use white IKEA SEKTION cabinets with VEDDINGE doors, 30 inches wide and 15 inches deep. Keeping the width, finish and door style the same makes it easier to see the price of the second row. The stacked version gives you 50 inches of cabinet height instead of 40. The four cabinet widths total 10 feet before any end fillers.
| 10 feet of upper cabinets | One row | Two stacked rows |
|---|---|---|
| Cabinet layout | Four 40-inch uppers | Four 30-inch uppers + four 20-inch tops |
| Cabinets and doors | $808 | $1,260 |
| Assembly and installation | $500–$700 | $1,000–$1,400 |
| Cabinets + installation labor | $1,308–$1,508 | $2,260–$2,660 |
Price sources checked November 19, 2026. 40-inch upper · 30-inch upper · 20-inch upper · Local installation rate
The single row uses four $202 cabinets. The stacked layout pairs a $178 cabinet with a $137 cabinet at each of the four positions. For labor, HandyTeam Pro, an installer serving Portland and Vancouver, publishes $125–$175 per box. At the same $150 rate for both layouts, the totals are $1,408 and $2,460, a difference of $1,052.
These are planning figures for cabinetry and installation on one wall. Add suspension rails, cover panels, knobs or pulls, crown, fillers, delivery and applicable tax. Glass, lighting, electrical work and removal of old cabinets are separate. Ask whether the installer charges more to hang the second tier. A job with a soffit to open or a ceiling to patch needs its own price.
What to ask for on a Vancouver or Portland estimate
Ask for two elevations of the same wall and an installed price for each, including the trim drawn at the top. Check whether the extra charge buys working doors and shelves or a finished panel over an empty space. For a whole-kitchen budget, see our Vancouver kitchen remodel cost guide or our Portland kitchen remodel cost guide.
What fits under an 8-, 9- or 10-foot ceiling?
Start with the lowest ceiling measurement along the cabinet wall. Subtract the planned height of the cabinet bottom above the finished floor. What remains must fit the upper cabinet, any second row, and the space your installer needs for mounting and trim.
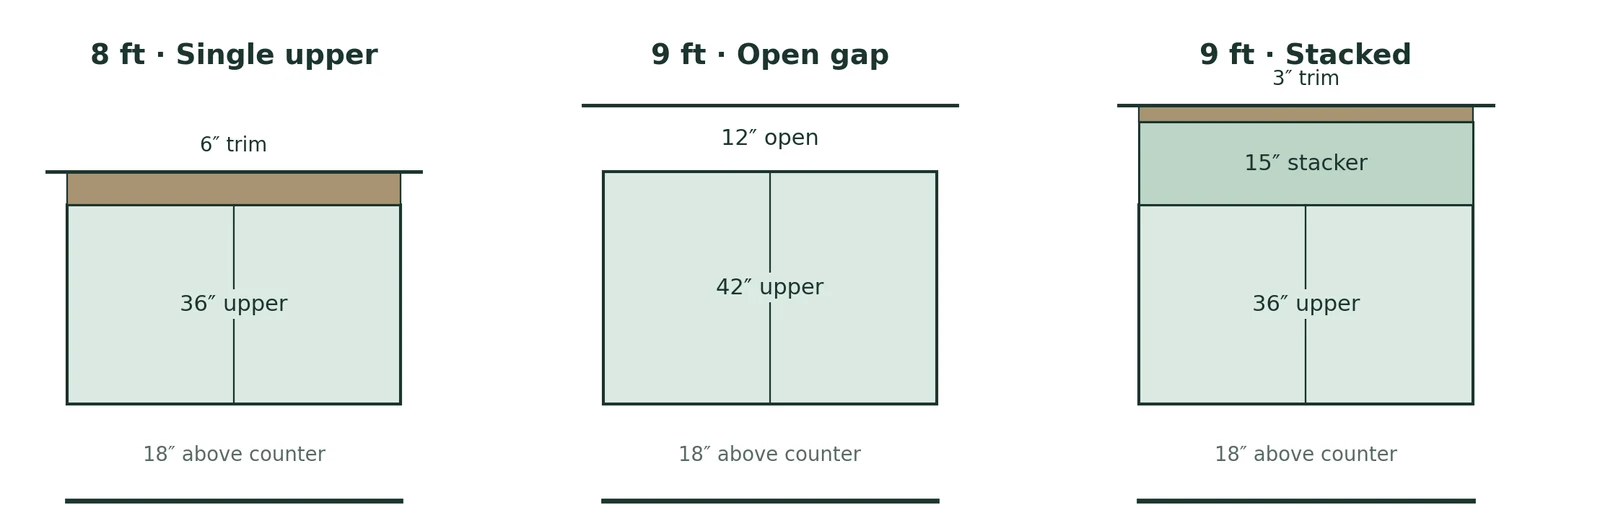
8-foot ceiling. With the cabinet bottom at 54 inches, you have 42 inches above it. A 36-inch cabinet leaves 6 inches for a flat trim band and crown. A 42-inch cabinet fills the space on paper. Check how the box mounts and how the doors clear the ceiling at its lowest spot before ordering that size.
9-foot ceiling. At the same starting height, you have 54 inches. One 42-inch upper leaves 12 inches open. A 36-inch upper with a 15-inch cabinet above it leaves 3 inches for trim. For an idea of how much you would use that row, pick out the things in your kitchen you take down only a few times a year.
10-foot or vaulted ceiling. A 42-inch upper starting at 54 inches ends at 8 feet, leaving 24 inches below a flat 10-foot ceiling. Draw a level line there first. You might prefer that line across the kitchen and one taller pantry wall, especially where the ceiling slopes.
The drawing assumes a 36-inch counter and 18 inches above it. Cabinet systems vary. IKEA’s installation guide, for example, shows a 20-inch counter-to-cabinet gap with its specified countertop. Follow the cabinet system and appliance instructions for the final layout, particularly at a range or hood.
Wall cabinet and stacker sizes · IKEA installation dimensions · KraftMaid measuring guide
What we built in a Felida kitchen
The family liked the original white cabinets and the view from the kitchen into the family room. What they lacked was a pantry. Copying the old layout with taller doors would have left the main problem unsolved. We kept the white finish, built a walk-through pantry and gave the kitchen a full-height wall of Shaker cabinetry with a paneled refrigerator.
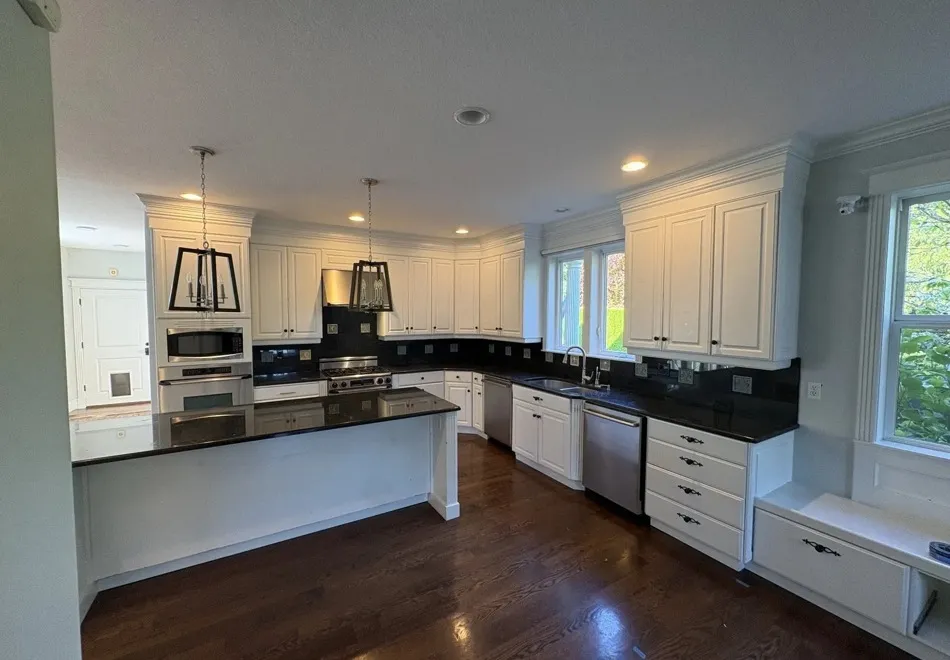
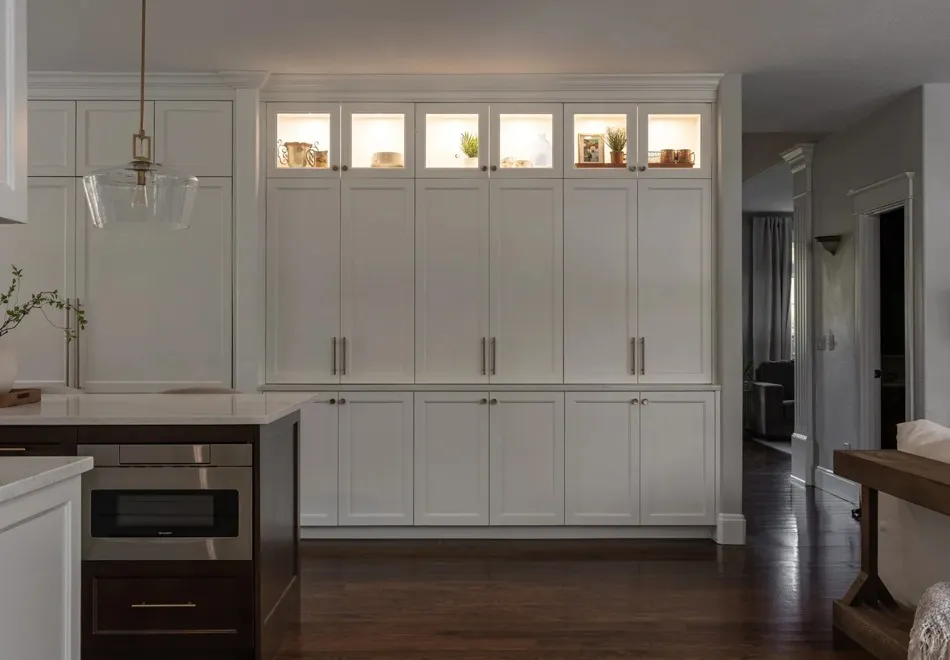
Look at the short glass doors in the after photo. They give display pieces a place of their own. Lighting inside those cabinets makes the pieces visible in the evening. The lights beneath the wall cabinets light the worktop for chopping and prep. If you mainly want a brighter prep area, price the under-cabinet lights on their own before adding glass-front uppers.
The published investment for the entire Felida project was $130,000–$170,000. It also included structural work, a new pantry, a paneled refrigerator and quartz counters and backsplash. The $1,052 cabinet comparison above uses a separate stock-cabinet example. See the Felida kitchen before and after.
When the highest shelf earns its keep
Lightweight holiday tins, empty vases and a serving platter you use twice a year are good candidates. Put the everyday coffee mugs where the shortest person who uses the kitchen can reach them comfortably. If the step stool has nowhere to live, a tall pantry with pullouts or deep drawers below the counter may give you more usable storage for the money.
Can you extend existing kitchen cabinets to the ceiling?
Yes, if the existing boxes are sound, the top doors will open freely and an installer can secure the new units using the cabinet manufacturer’s method. A matching add-on cabinet works best when the original door style and finish are still available. Bring an old door to the cabinet shop. A new white sample can look noticeably different beside paint that has aged in your kitchen.
Should you use stacked cabinets, crown molding or an open gap?
Choose stacked cabinets when you want another compartment with its own door. Choose a trim panel and crown molding when the goal is to close the gap and cut down on dusting. Ask to see the trim full size if the gap is wide. Choose an open gap if you like the proportions, have a sloped ceiling or would rather use the money elsewhere.
What if there is a soffit or the ceiling is uneven?
A soffit is the boxed-in strip above many older cabinets. It can hide pipes, wiring or a duct. Have your remodeler establish what is inside before pricing its removal. For an uneven ceiling, measure at several points and ask the installer to show how a fitted trim strip will follow the ceiling while keeping the cabinet tops level. Cabinet measuring guide.
What should you decide before ordering?
Stand where you normally enter the kitchen and have someone mark the proposed cabinet and trim heights with painter’s tape. Look at how they line up with the window, hood and pantry. Then open the tallest appliance you keep on the counter and check the lid clearance. Those two quick checks tell you more about the layout than a door sample can.
Planning a kitchen remodel in Vancouver, WA, or the Portland metro? During a Serden walkthrough, we can look at your ceiling, talk through what you want to store and compare cabinet layouts for your space. Call (360) 836-7775.
Explore kitchen remodeling in Vancouver or start with our kitchen budget calculator.