
Felida — Vancouver, WA 98685
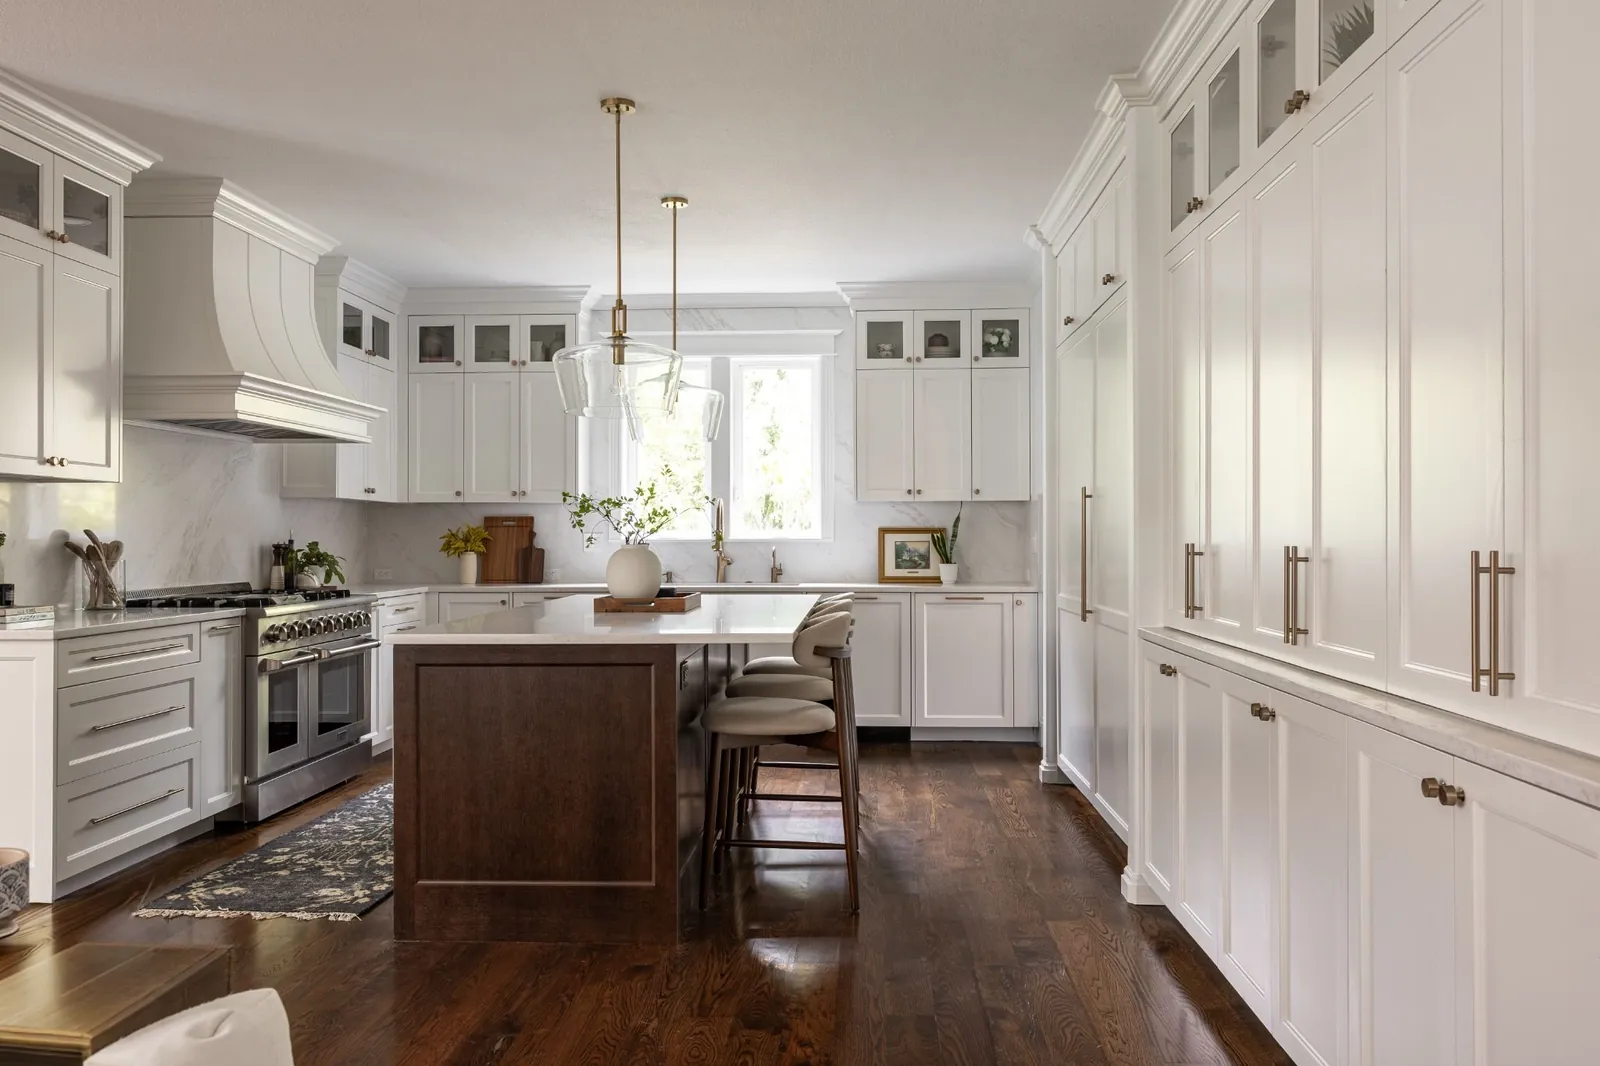
The Walden family loved two things about their Felida kitchen: the open plan, and the white cabinets. Everything else was holding them back. There were never enough cabinets, there was no pantry at all, the range and its hood were too small for how they cook, and the layout didn’t make it easy to spend time in the room. Serden Group designed and built a kitchen that keeps the white and the openness and fixes the rest — a new load-bearing beam and a new wall to create a walk-through butler’s pantry behind arched openings, a floor-to-ceiling pantry wall with a hidden refrigerator, a pro-style range under a custom hood, six slabs of quartz, and lighting built into the cabinetry. About three months from demolition to walkthrough.
This wasn’t a kitchen anyone wanted to tear out for the sake of it. It was bright, it opened onto the breakfast area and the family room, and the homeowners liked its white cabinets enough to ask us to keep the color. The problem was capacity. The cabinet runs stopped short, a long built-in window seat sat where storage could have gone, and with no pantry every box of cereal and every small appliance was competing for the same few cabinets.
The cooking side had fallen behind, too. The range was smaller than the family wanted for everyday cooking, with a narrow stainless hood above it that didn’t move much air, and black granite and dark tile made the work zone feel heavier than the rest of the room. The Waldens wanted a kitchen they would actually spend time in — more storage, a bigger stove, better ventilation and a better layout — without losing what they already liked about it.
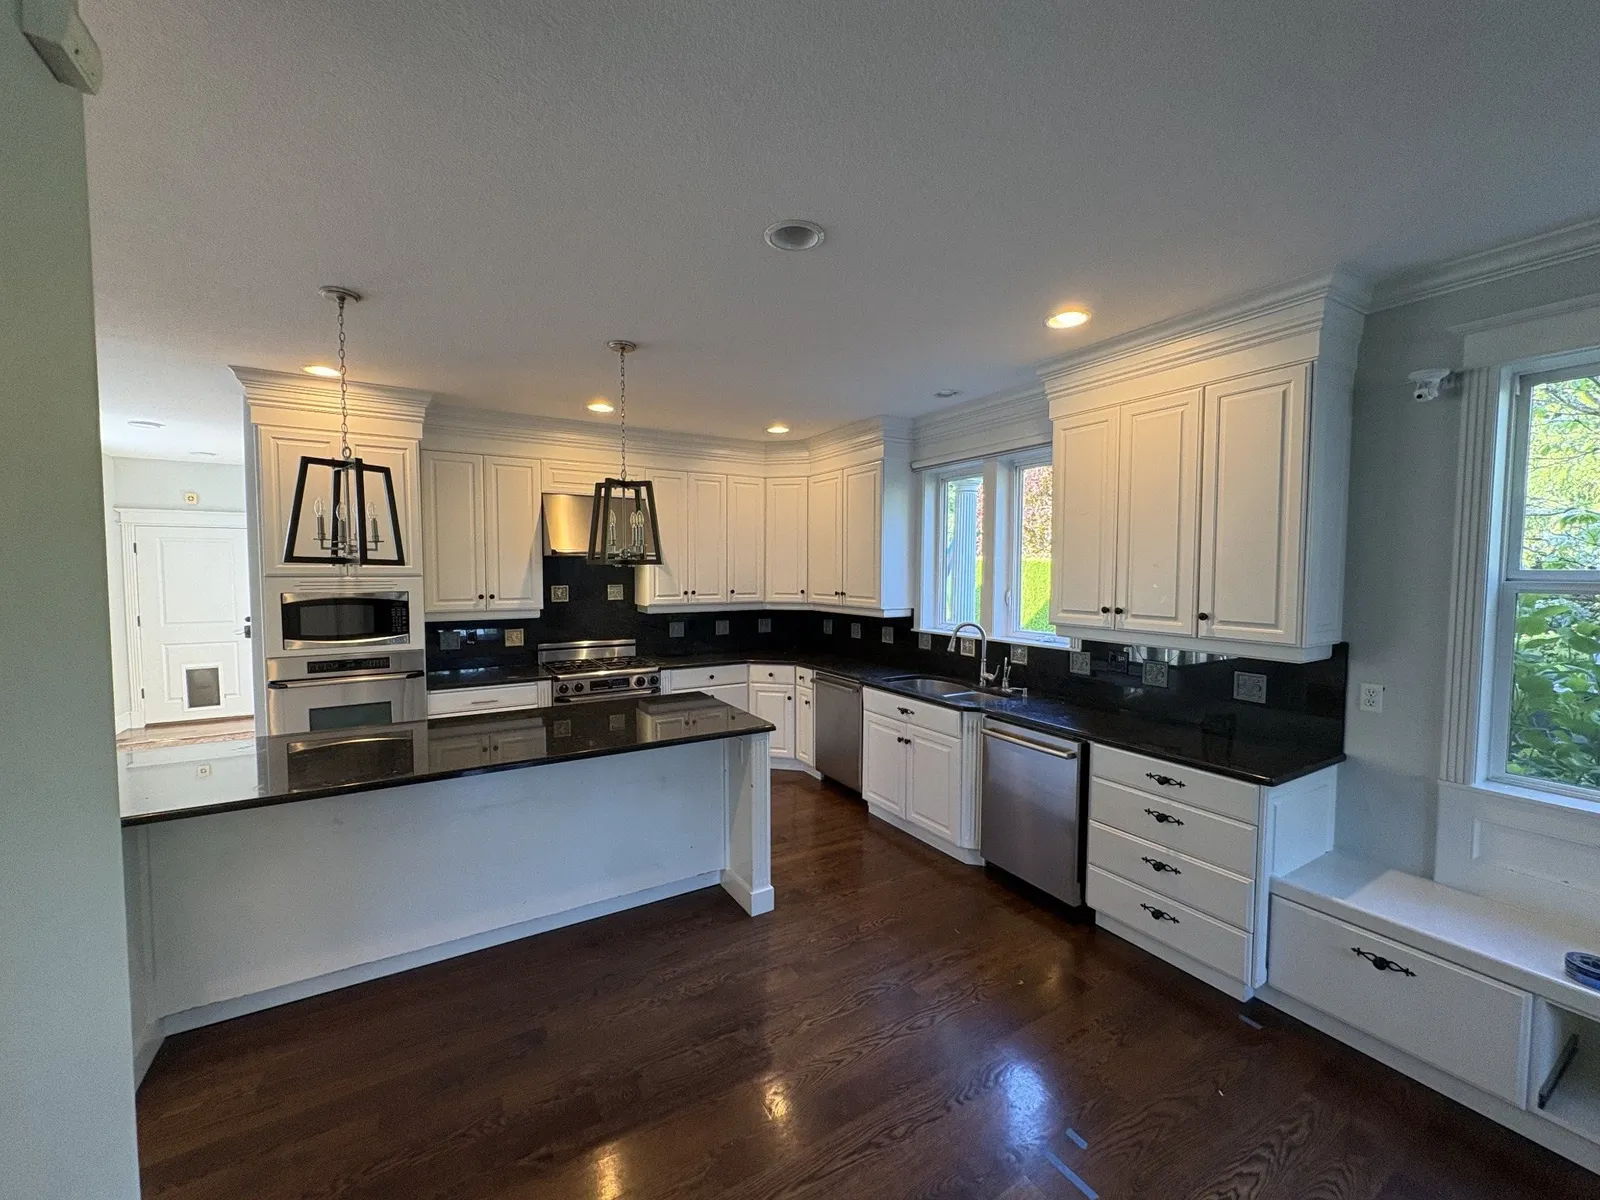
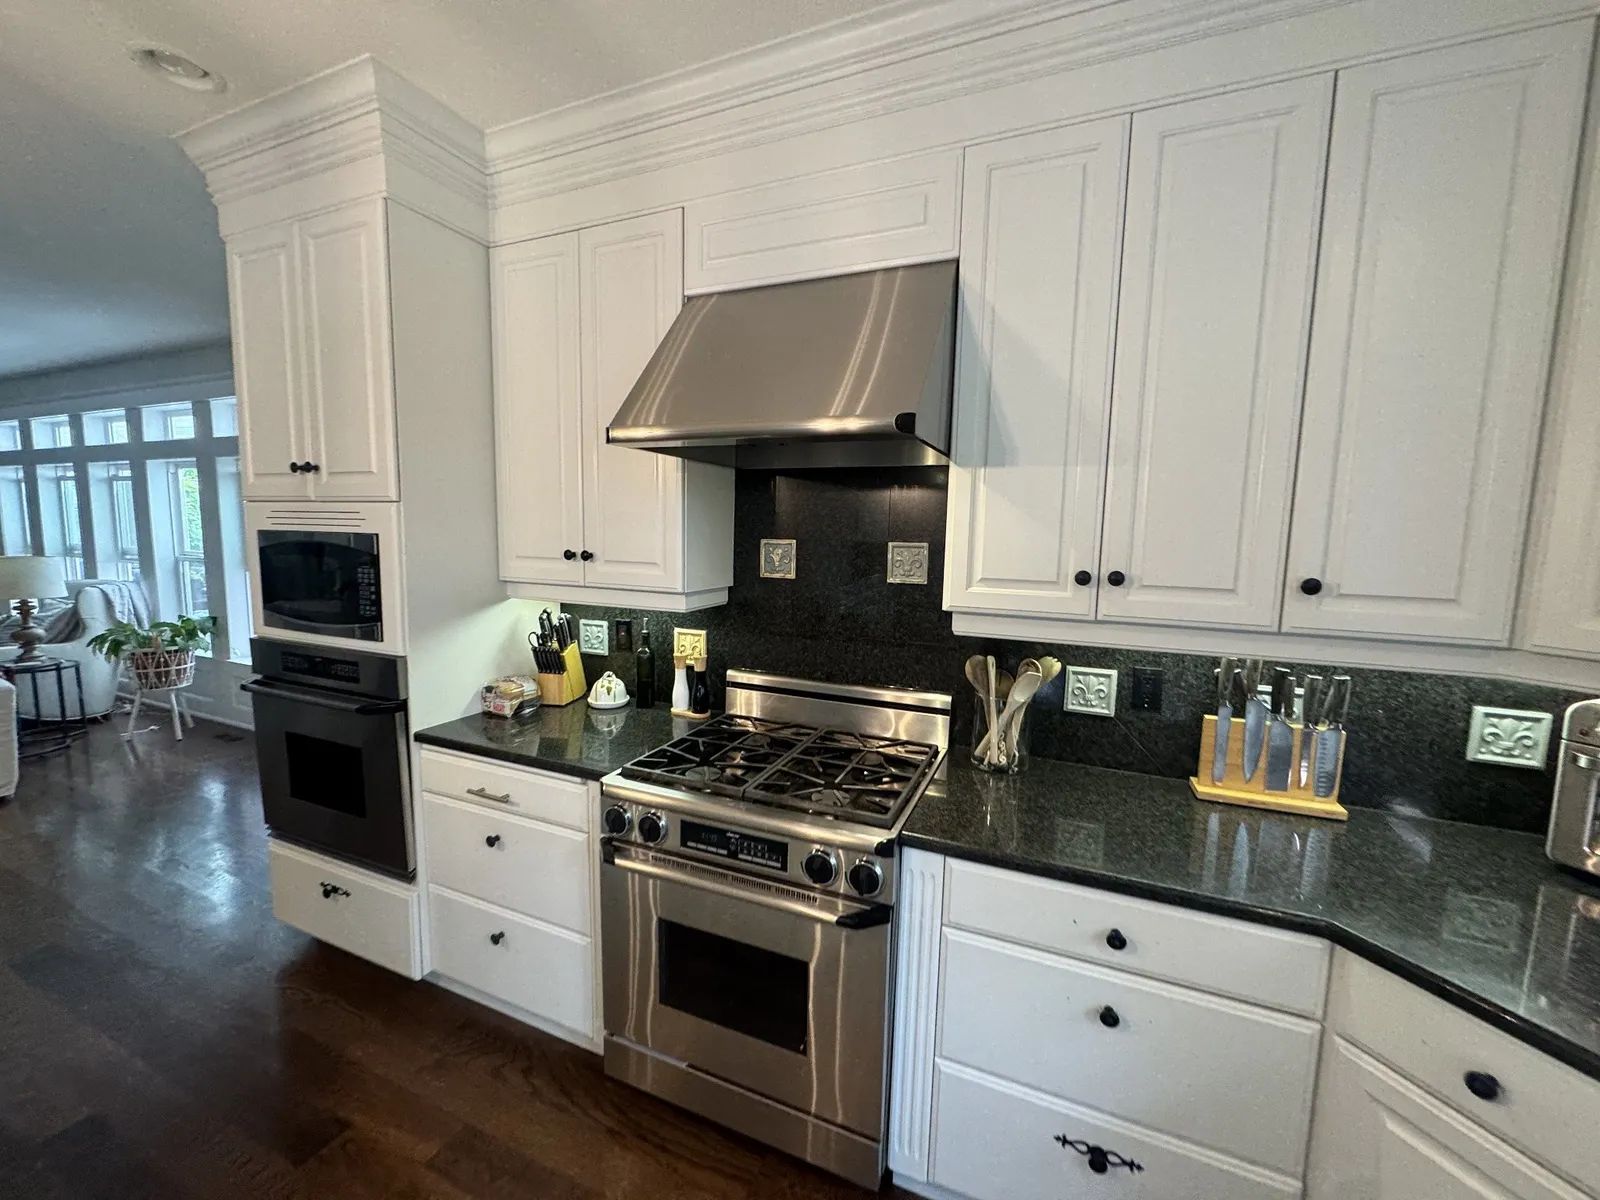
Six of the homeowners’ photos of the original kitchen are below — select any of them to open the full gallery.
The brief was clear about what to keep and what to change, which shaped every design decision:
You can’t add a pantry, a wall of tall cabinets and a bigger cooking zone to a kitchen without finding space somewhere, and in this house the space was in the walls. Restructuring the layout around a new load-bearing beam let us build a new wall and carve out a walk-through butler’s pantry, while the main kitchen stayed as open to the family room as it was before. Serden Group managed the whole project, from the first design drawings to the final walkthrough.
The old wall arrangement couldn’t accommodate a pantry, so it was re-engineered. A new load-bearing beam now carries the structure across the opening, which freed us to frame a new wall in a better position. That one structural change is what made room for everything else on the list.
The new wall created a pantry room the house never had: dark stained cabinetry against charcoal walls, a second sink with a matte black faucet, beverage drawers, floating wood shelves and a coffee station under its own windows. Arched openings frame the walkway into it, so it reads as part of the kitchen rather than a closet off it.
One whole side of the kitchen is now tall white shaker cabinetry with long brass pulls. A new paneled refrigerator is built into it behind matching doors, so the open-plan view from the living room is cabinetry rather than stainless. Open canister shelving, an appliance garage and deep drawers sit in the same run.
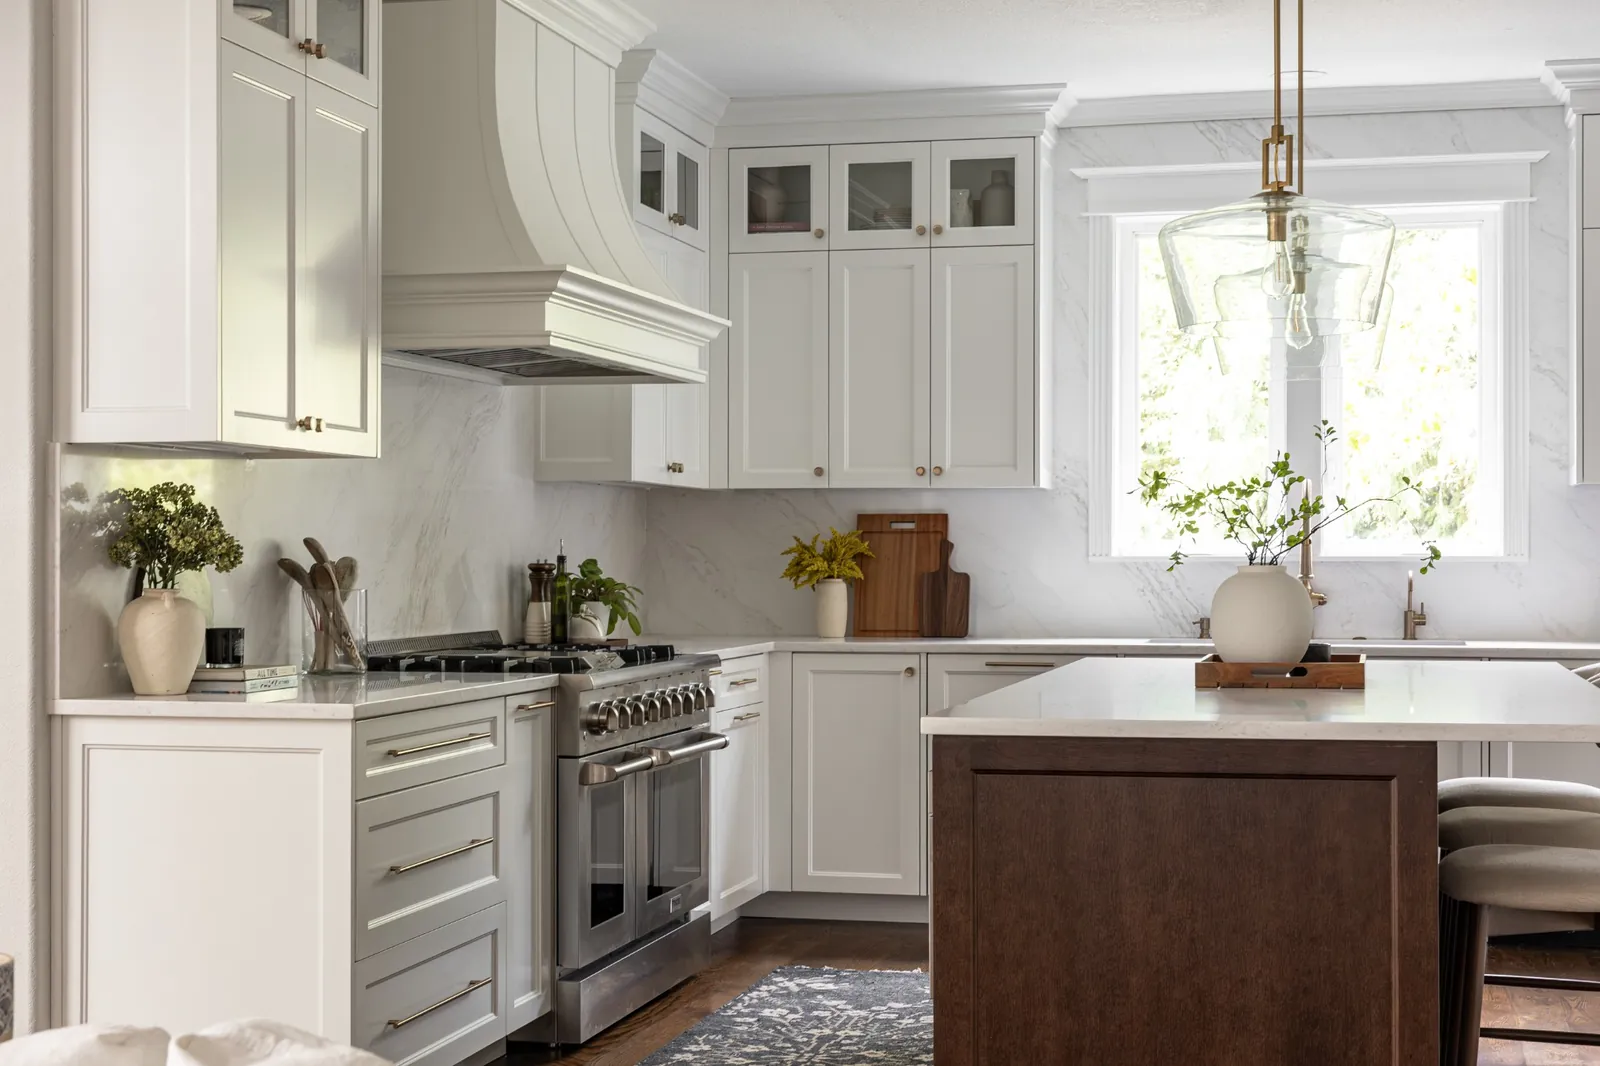
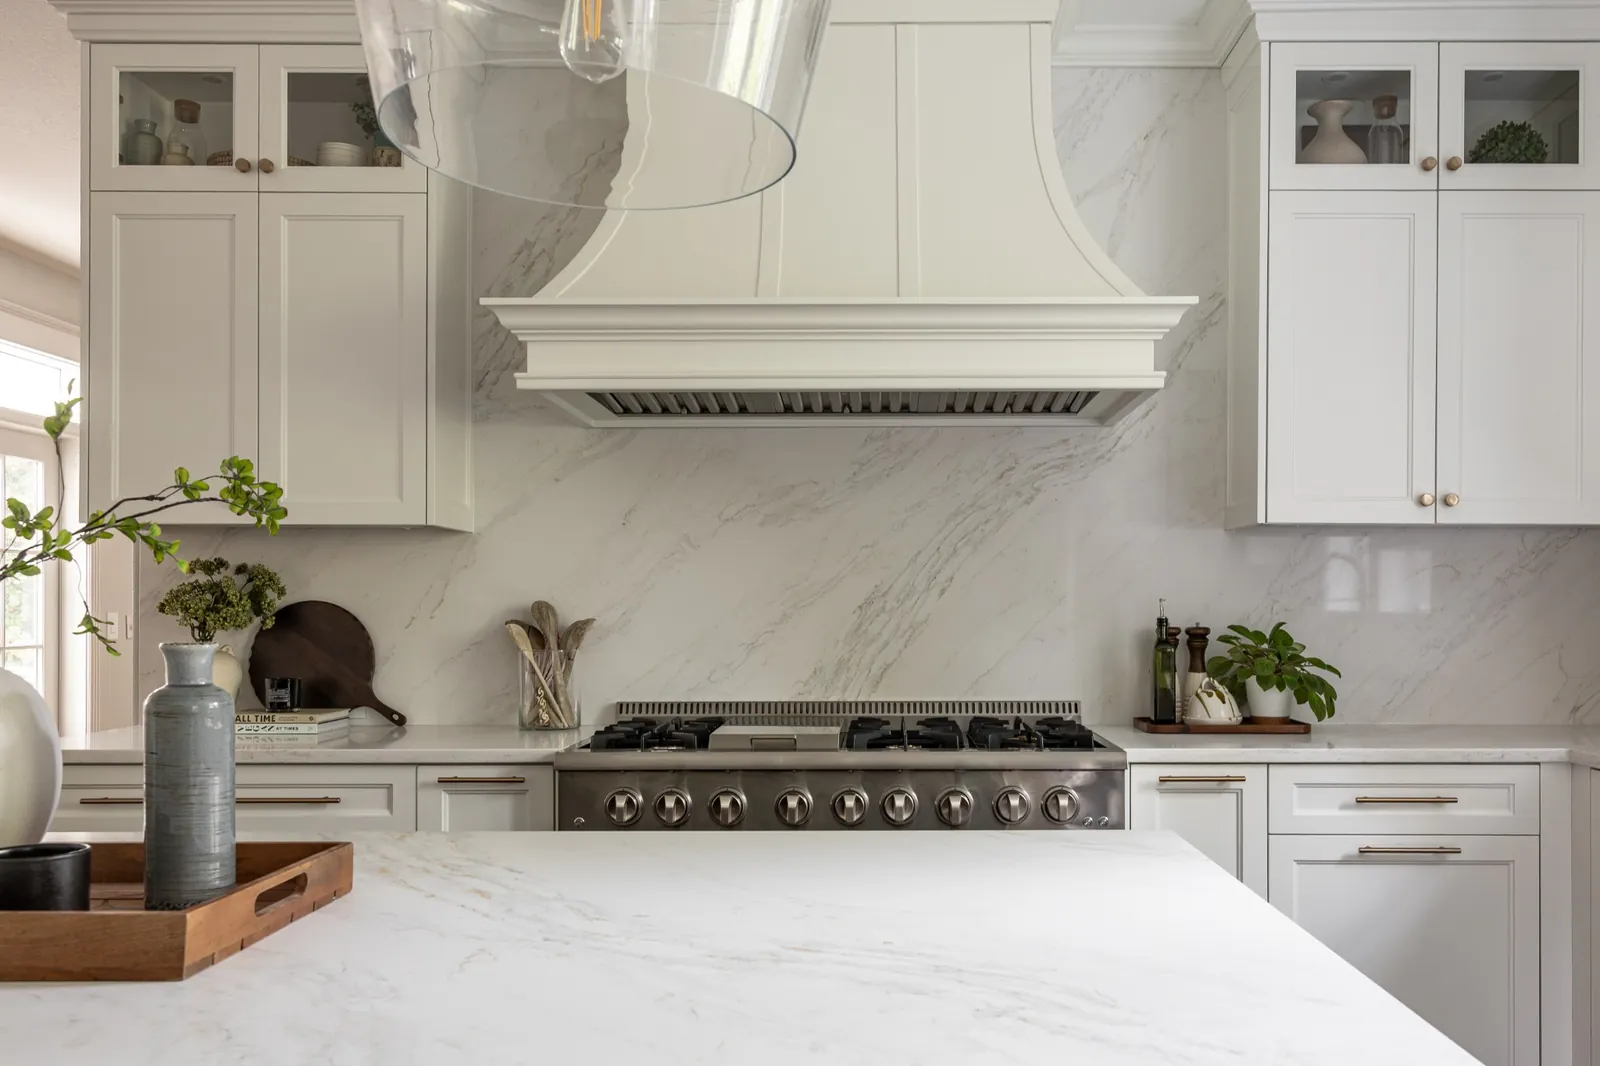
A pro-style dual-fuel range replaced the old one, and a custom curved painted hood with a stainless insert replaced the narrow hood that couldn’t keep up. The hood is the visual anchor of the room as well as the working one, and the full-height quartz backsplash runs up behind it.
Custom organizers went into the cabinets: pull-out spice storage and tray dividers beside the range, deep drawer stacks in place of door boxes, and a microwave drawer built into the stained wood island so the microwave sits low and out of the sight line.
Under-cabinet lighting runs along the counters for prep, the glass-front uppers are lit from inside, and above-cabinet lighting adds an evening glow. New brass-and-glass pendants hang over the island. In the evening the kitchen reads as warm and layered rather than lit from overhead alone.
Every kitchen of this scope has a couple of moments where precision matters more than speed. On this project there were two, and both are now invisible — which is the point.
The backsplash behind the range isn’t tile — it is one huge sheet of quartz, cut to wrap tight around the new custom hood. There is no grout line to hide a mistake, so the template and the cuts had to be precise to the eighth of an inch. The finished piece was big and heavy enough that it took four people to carry it in and set it safely. Across the countertops, island and backsplash, the kitchen used six large quartz slabs.
The homeowners wanted to keep their existing hardwood floors, which kept the kitchen continuous with the rest of the house and saved replacing a floor that was still sound. But where walls and cabinets moved, the floor had to be repaired, and the original stain had aged for about 20 years. No off-the-shelf color matches a finish like that. After rounds of trial-and-error samples we arrived at an exact match, and the repaired areas now disappear into the original floor.
This was a design-build project: Serden Group managed everything from design to finish. Our in-house crew handled demolition, framing, cabinet installation and finish carpentry, supported by licensed, vetted trade partners on the plumbing, electrical and mechanical scopes and the quartz fabrication. One project manager coordinated the schedule, the inspections and every trade from the first walkthrough to the final punch list.
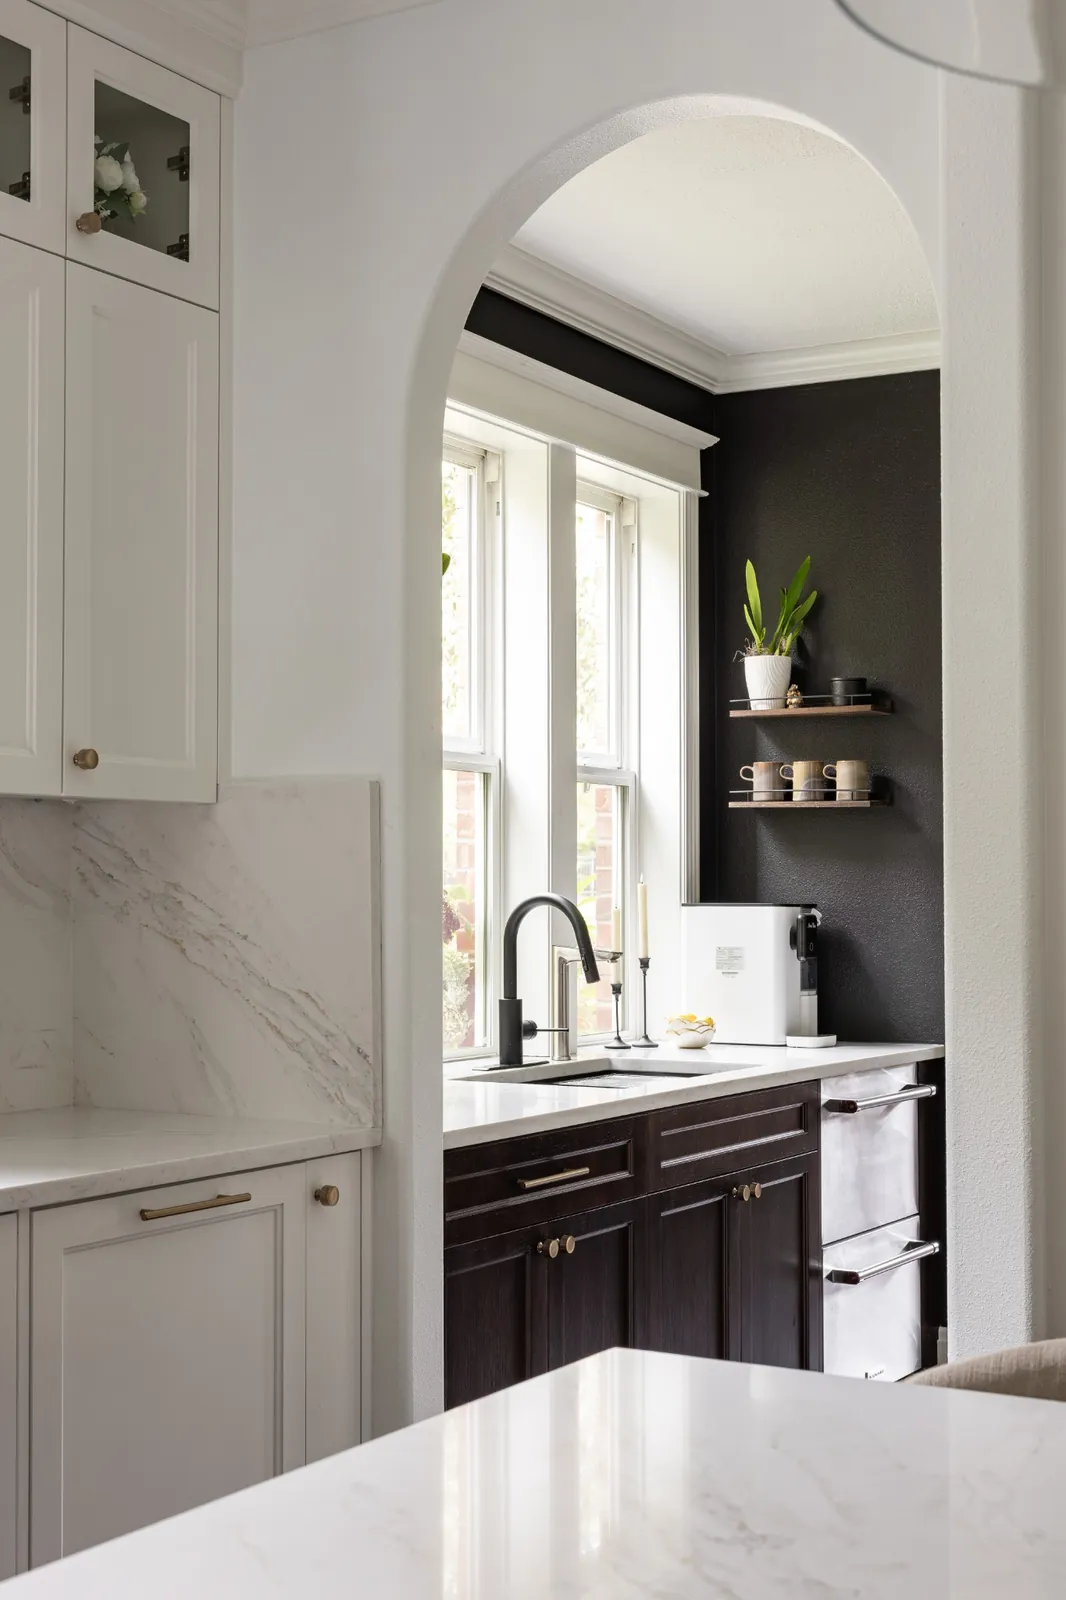
A classic white kitchen can look flat if every surface is the same. This one is layered: white cabinetry and quartz for brightness, stained wood for warmth, brass for detail, and a darker pantry room for contrast.
Structural work sets the pace on a kitchen like this. The beam and the new wall have to be built and inspected before rough-in can finish, and quartz can only be templated once the cabinets are installed. This is roughly how the three months broke down.
Phase 1
Layout drawings, cabinet design, appliance selection (the paneled refrigerator and range dictate cabinet dimensions) and permits. Custom cabinetry is ordered early so shop time runs alongside construction.
Phase 2
Protect the house, remove the old cabinets, counters, backsplash and appliances, then install the new load-bearing beam, frame the new pantry wall and form the arched openings. Structural inspection.
Phase 3
Supply and drain lines moved for the new layout and the pantry sink, circuits run for the range, hood, refrigerator, ice maker and every layer of cabinet lighting, and HVAC runs relocated. Rough inspections signed off.
Phase 4
Walls closed, arches finished and the room painted. The hardwood is patched where walls and cabinets moved, and stain samples are tested until the new finish matches the old.
Phase 5
Cabinetry and the pantry wall installed and leveled, hidden organizers fitted, then six slabs of quartz templated, fabricated and set — including the full-height backsplash piece cut around the hood.
Phase 6
Range, hood, refrigerator panels and ice maker installed, lighting and hardware finished, final inspection, punch list and a walkthrough with the Walden family.
A selection of 24 photos of the completed kitchen and butler’s pantry. Select any image to open the full gallery of all 106 finished photos, plus the 6 before photos further up this page.